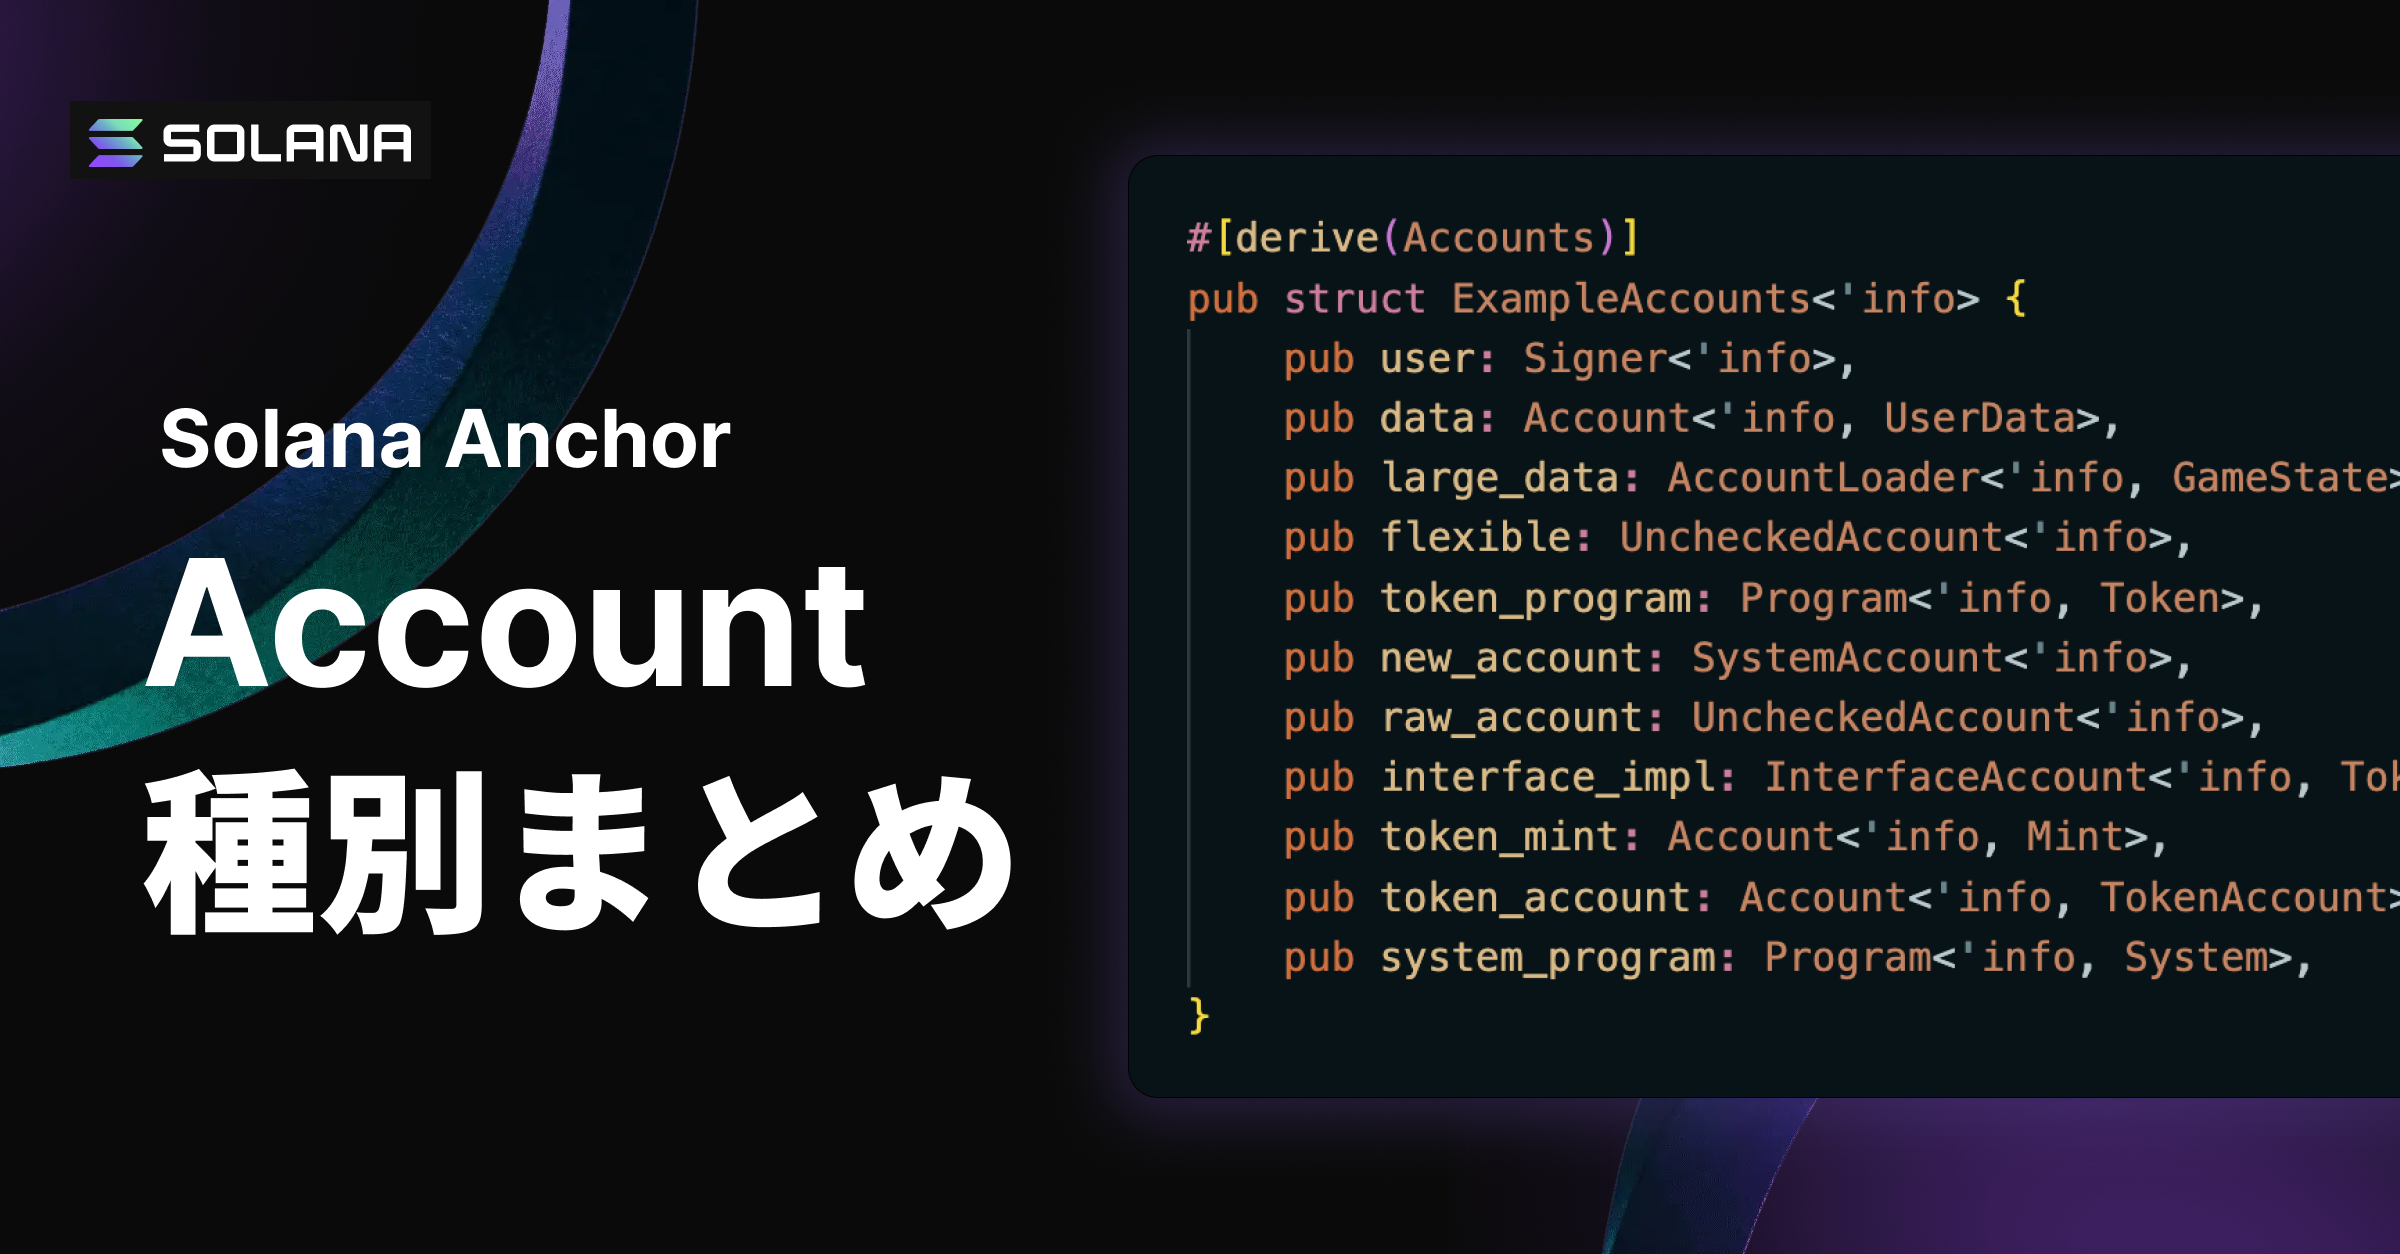
Solana Anchor アカウントタイプ解説:技術特性と選択基準
Solana AnchorのSigner、Account、AccountLoader、UncheckedAccount、Program、SystemAccount、AccountInfo、InterfaceAccount、Mint、TokenAccount、SystemProgramの技術的特性、パフォーマンス、セキュリティ特性を客観的に解説し、技術要件に基づく選択基準を提供します。
公開日2025.07.31
更新日2025.07.31
はじめに
Solana Anchorでは複数のアカウントタイプが用意されており、それぞれ異なる技術特性を持ちます。
// アカウントタイプの選択例
#[derive(Accounts)]
pub struct ExampleAccounts<'info> {
    pub user: Signer<'info>,                    // 署名認証
    pub data: Account<'info, UserData>,         // 構造体データ
    pub large_data: AccountLoader<'info, GameState>, // 大容量データ
    /// CHECK: Manual validation required
    pub flexible: UncheckedAccount<'info>,      // 手動検証
    pub token_program: Program<'info, Token>,   // プログラム参照
    #[account(mut)]
    pub new_account: SystemAccount<'info>,      // System Program 所有口座(未初期化/初期化済みの双方で利用)
    /// CHECK: Low-level access needed
    pub raw_account: UncheckedAccount<'info>,   // 低レベルアクセス(to_account_info() で操作)
    pub interface_impl: InterfaceAccount<'info, TokenAccount>, // インターフェース対応アカウントの一例
    pub token_mint: Account<'info, Mint>,       // SPLトークンミント
    pub token_account: Account<'info, TokenAccount>, // SPLトークンアカウント
    pub system_program: Program<'info, System>, // システムプログラム
}
本記事では、各アカウントタイプの技術的特性、パフォーマンス特性、セキュリティ特性を客観的に解説し、技術要件に基づく選択基準を提供します。
目次
目次
対象読者
- Anchorの基本構文を理解している開発者
- アカウントタイプの技術的違いを理解したい方
- パフォーマンスとセキュリティの観点から最適な選択をしたい方
アカウントタイプの技術的特性
Anchorの各アカウントタイプは異なる技術的特性を持ちます。まず各タイプの基本的な動作を理解しましょう。
基本的な選択フロー
// 選択基準に基づく例
#[derive(Accounts)]
pub struct ExampleInstruction<'info> {
    pub signer: Signer<'info>,              // 認証が必要 → Signer
    pub small_data: Account<'info, Config>, // 構造体データ → Account
    pub large_data: AccountLoader<'info, GameState>, // 大容量 → AccountLoader
    pub flexible: UncheckedAccount<'info>,  // 柔軟な検証 → UncheckedAccount
    pub program: Program<'info, Token>,     // プログラム参照 → Program
}
技術要件による選択基準
| 要件 | 適切なタイプ | 技術的理由 |
|---|---|---|
トランザクション署名が必要 | Signer<'info> | 暗号学的認証の実行 |
構造体データの読み書き | Account<'info, T> | 自動的なデシリアライゼーション |
大容量データ(10KB以上) | AccountLoader<'info, T> | ゼロコピーで反序列化コストを削減(固定長・zero_copy構造体向け) |
カスタム検証ロジック | UncheckedAccount<'info> | 手動でのアカウント検証 |
他プログラムの呼び出し | Program<'info, T> | CPI(Cross-Program Invocation)の実行 |
アカウントの初期化 | SystemAccount<'info> | 未初期化状態からの安全な作成 |
低レベルアカウント操作 | AccountInfo<'info> | 直接的なアカウントデータ操作 |
インターフェース実装 | InterfaceAccount<'info, T> | インターフェース準拠の検証 |
SPLトークンミント操作 | Account<'info, Mint> | トークンミント固有の検証 |
SPLトークンアカウント操作 | Account<'info, TokenAccount> | トークンアカウント固有の検証 |
システム操作の実行 | Program<'info, System> | システムプログラムへのCPI |
主要アカウントタイプの使用方法
テーブルで確認した11種類の主要アカウントタイプについて、実際の使用方法を詳しく解説します。
Signer<'info>:
トランザクション署名認証
トランザクションの署名が必要な場合に使用します。セキュリティの基礎となる重要なタイプです。
基本的な使用パターン
#[derive(Accounts)]
pub struct TransferTokens<'info> {
    // 署名必須:不正実行を防止
    #[account(mut)]
    pub authority: Signer<'info>,

    #[account(
        mut,
        constraint = from_account.owner == authority.key()
    )]
    pub from_account: Account<'info, TokenAccount>,
}
セキュリティの重要性:
署名検証の仕組み
Signerタイプを使用しない場合、深刻なセキュリティリスクが発生します。以下の例で具体的に確認しましょう。
// ❌ 危険:署名チェックなし
#[derive(Accounts)]
pub struct NoSigner<'info> {
    /// 危険 署名不要
    pub user: UncheckedAccount<'info>,
    #[account(mut)]
    pub user_data: Account<'info, UserProfile>,
}

pub fn vulnerable_function(ctx: Context<NoSigner>) -> Result<()> {
    // 誰でも任意のuser_dataを変更可能(重大なセキュリティホール)
    let user_data = &mut ctx.accounts.user_data;
    user_data.balance += 1000000; // 任意のユーザーの残高を増加
    Ok(())
}
// ✅ 安全:署名チェックあり
#[derive(Accounts)]
pub struct WithSigner<'info> {
pub user: Signer<'info>, // 署名が必要
#[account(
mut,
constraint = user_data.owner == user.key() @ ErrorCode::UnauthorizedAccess
)]
pub user_data: Account<'info, UserProfile>,
}
pub fn secure_function(ctx: Context<WithSigner>) -> Result<()> {
// 署名したユーザーのみ実行可能
let user_data = &mut ctx.accounts.user_data;
user_data.balance += 1000; // 自分のデータのみ変更可能
Ok(())
}Solanaプロトコルレベルでの署名検証
Signerタイプが提供するセキュリティは、Solanaプロトコルの署名検証機能に基づいています:
- トランザクション構築時: クライアントが秘密鍵でトランザクションに署名
- 送信時: 署名付きトランザクションがバリデーターに送信
- 検証段階: バリデーターが署名の有効性を暗号学的に検証
- プログラム実行前: Anchorが
Signer<'info>アカウントの署名を確認 - 実行許可: 署名が有効な場合のみプログラム実行を継続
署名検証はランタイムで行われ、該当口座の is_signer に反映されます。Anchor は Signer<'info> を要求することで、このフラグを自動チェックします。
実際のセキュリティ脆弱性の例
// 実際にあったセキュリティホールのパターン
#[derive(Accounts)]
pub struct VulnerableWithdraw<'info> {
    /// CHECK: 署名検証を忘れた危険な実装
    pub authority: UncheckedAccount<'info>,

    #[account(mut)]
    pub vault: Account<'info, TokenAccount>,

    #[account(mut)]
    pub destination: Account<'info, TokenAccount>,

    pub token_program: Program<'info, Token>,
}

pub fn vulnerable_withdraw(ctx: Context<VulnerableWithdraw>, amount: u64) -> Result<()> {
    // ❌ 危険:署名検証なしでCPIを実行
    // 実際の脆弱性は、カスタム状態更新やPDA署名検証の不備で発生

    let cpi_ctx = CpiContext::new(
        ctx.accounts.token_program.to_account_info(),
        spl_token::cpi::Transfer {
            from: ctx.accounts.vault.to_account_info(),
            to: ctx.accounts.destination.to_account_info(),
            authority: ctx.accounts.authority.to_account_info(), // 署名チェックなし!
        },
    );

    spl_token::cpi::transfer(cpi_ctx, amount)?;
    Ok(())
}

// 修正版:Signerで適切に保護
#[derive(Accounts)]
pub struct SecureWithdraw<'info> {
    pub authority: Signer<'info>, // 署名必須

    #[account(
        mut,
        constraint = vault.owner == authority.key() @ ErrorCode::UnauthorizedVault
    )]
    pub vault: Account<'info, TokenAccount>,

    #[account(mut)]
    pub destination: Account<'info, TokenAccount>,

    pub token_program: Program<'info, Token>,
}
重要なポイント
- 自動的な署名検証: Anchorが署名の有効性を自動チェック
- セキュリティ確保: 未署名のトランザクションは自動的に拒否
- 権限管理: アカウントの所有者認証に使用
- プロトコルレベル保護: Solana自体の暗号学的セキュリティを活用
- 攻撃防止: なりすましや不正アクセスを根本的に防止
Account<'info, T>
構造体データの読み書き
構造体データを安全に扱うための標準的な選択。最も頻繁に使用されるタイプです。
基本的な使用パターン
#[account]
pub struct UserProfile {
    pub authority: Pubkey,
    pub name: String,
    pub level: u64,
    pub created_at: i64,
}

#[derive(Accounts)]
pub struct UpdateProfile<'info> {
    #[account(mut, has_one = authority)]
    pub user_profile: Account<'info, UserProfile>,

    pub authority: Signer<'info>,
}
自動検証機能
Account<'info, T>は以下を自動的にチェックします:
- 所有者検証: 正しいプログラムが所有しているか
- Discriminator確認: データ構造が一致するか
- サイズ検証: データサイズが適切か
使用場面
- データサイズが10KB以下
- 構造体全体に頻繁にアクセス
- 型安全性とセキュリティを重視
AccountLoader<'info, T>:
大容量データ処理
10KB以上の大容量データを効率的に扱うための特殊なタイプです。
基本的な使用パターン
#[account(zero_copy)]
pub struct LargeGameState {
    pub players: [PlayerData; 1000],
    pub world_objects: [WorldObject; 5000],
    pub events: [GameEvent; 10000],
}

#[derive(Accounts)]
pub struct UpdateGameData<'info> {
    pub player: Signer<'info>,

    #[account(mut)]
    pub game_state: AccountLoader<'info, LargeGameState>,
}
ゼロコピー参照(反序列化回避)
pub fn update_player_position(
    ctx: Context<UpdateGameData>,
    player_index: usize,
    new_position: Position
) -> Result<()> {
    // Borshの再デシリアライズを避け、Ref/RefMutで口座データを直接借用
    let mut game_state = ctx.accounts.game_state.load_mut()?;
    game_state.players[player_index].position = new_position;
    // メモリ上のデータを直接操作、コピーコストなし
    Ok(())
}
パフォーマンスメリット
- CPU使用量削減: Borshの再デシリアライズを避けてCPU制限を回避
- ゼロコピー参照: Ref/RefMutで口座データを直接借用
- 大容量データ対応: 数十KB以上のデータも効率的に処理
※ 「10KB以上」はあくまで目安です。実際にはデータ形状とアクセス頻度(反序列化コスト/更新パターン)を基準に Account と AccountLoader を選択してください。
※ ゼロコピー構造体は固定長・POD(Vec/String/可変長は不可)で定義してください。#[account(zero_copy)] を付け、配列やプリミティブ型でサイズが静的に決まる設計が前提です。
※ load() / load_mut() で得た参照は CPI の前に必ずスコープから外して解放してください(drop(ref_mut) 等)。借用中に CPI を呼ぶと実行時に失敗します。
UncheckedAccount<'info>:
カスタム検証ロジック
手動検証により柔軟性を提供する上級者向けタイプです。
基本的な使用パターン
#[derive(Accounts)]
pub struct FlexibleValidation<'info> {
    pub authority: Signer<'info>,

    // 手動検証が必要:必ずCHECKコメントを記述
    /// CHECK: Token mint validated against program whitelist
    pub token_mint: UncheckedAccount<'info>,
}
手動検証の実装例
pub fn validate_token_mint(ctx: Context<FlexibleValidation>) -> Result<()> {
    let token_mint = &ctx.accounts.token_mint;

    // 1. 所有者チェック
    require!(
        token_mint.owner == &spl_token::ID,
        ErrorCode::InvalidMintOwner
    );

    // 2. データサイズチェック
    let mint_data = token_mint.try_borrow_data()?;
    require!(
        mint_data.len() == spl_token::state::Mint::LEN,
        ErrorCode::InvalidMintSize
    );

    // 3. ホワイトリストチェック
    const ALLOWED_MINTS: &[Pubkey] = &[/* allowed addresses */];
    require!(
        ALLOWED_MINTS.contains(&token_mint.key()),
        ErrorCode::UnauthorizedMint
    );

    Ok(())
}
使用時の注意点
- 必須コメント:
/// CHECK:で検証内容を明記 - 手動検証: 所有者、サイズ、データ構造を手動でチェック
- セキュリティリスク: 検証不備は脆弱性につながる
UncheckedAccount検証チェックリスト
UncheckedAccountを使用する際は以下を必ず検証してください:
pub fn validate_unchecked_account<'info>(account: &UncheckedAccount<'info>) -> Result<()> {
    // 1. 所有者検証
    require!(
        account.owner == &expected_program_id,
        ErrorCode::InvalidOwner
    );

    // 2. データサイズ検証
    require!(
        account.data_len() >= expected_size,
        ErrorCode::InvalidDataSize
    );

    // 3. アカウント初期化状態確認
    require!(
        account.lamports() > 0,
        ErrorCode::UninitializedAccount
    );

    // 4. 書き込み権限確認(必要な場合)
    if writing_required {
        require!(
            account.is_writable,
            ErrorCode::AccountNotWritable
        );
    }

    // 5. 署名確認(権限アカウントの場合)
    if signature_required {
        require!(
            account.is_signer,
            ErrorCode::MissingSignature
        );
    }

    Ok(())
}
Program<'info, T>:
他プログラムの呼び出し
CPI(Cross-Program Invocation)で他のプログラムを呼び出す際に使用します。
基本的な使用パターン
#[derive(Accounts)]
pub struct TokenTransfer<'info> {
    #[account(mut)]
    pub from: Account<'info, TokenAccount>,

    #[account(mut)]
    pub to: Account<'info, TokenAccount>,

    pub authority: Signer<'info>,

    // SPL Tokenプログラムの参照
    pub token_program: Program<'info, Token>,
}
CPI実行例
pub fn transfer_tokens(
    ctx: Context<TokenTransfer>,
    amount: u64
) -> Result<()> {
    let cpi_context = CpiContext::new(
        ctx.accounts.token_program.to_account_info(),
        spl_token::cpi::Transfer {
            from: ctx.accounts.from.to_account_info(),
            to: ctx.accounts.to.to_account_info(),
            authority: ctx.accounts.authority.to_account_info(),
        },
    );

    spl_token::cpi::transfer(cpi_context, amount)?;
    Ok(())
}
よく使用するプログラム
// システムプログラム(アカウント作成など)
pub system_program: Program<'info, System>,

// SPL Tokenプログラム(トークン操作)
pub token_program: Program<'info, Token>,

// Associated Token Program(ATAの作成)
pub associated_token_program: Program<'info, AssociatedToken>,
SystemAccount<'info>:
アカウントの初期化
未初期化状態のアカウントを安全に作成する際に使用します。新しいアカウントの作成時に必須のタイプです。
基本的な使用パターン
#[derive(Accounts)]
pub struct CreateUserProfile<'info> {
    #[account(mut)]
    pub authority: Signer<'info>,

    // 新規アカウント作成:System Program 所有口座(未初期化/初期化済みの両方に用いる)
    #[account(
        init,
        payer = authority,
        space = 8 + UserProfile::INIT_SPACE
    )]
    pub user_profile: Account<'info, UserProfile>,

    pub system_program: Program<'info, System>,
}
PDA(Program Derived Address)での使用
#[derive(Accounts)]
pub struct CreateGameSession<'info> {
    #[account(mut)]
    pub player: Signer<'info>,

    // PDAアカウントの初期化
    #[account(
        init,
        payer = player,
        space = 8 + GameSession::INIT_SPACE,
        seeds = [b"game_session", player.key().as_ref()],
        bump
    )]
    pub game_session: Account<'info, GameSession>,

    pub system_program: Program<'info, System>,
}
重要なポイント
- 用途: System Program 所有の口座を安全に受け取るための型(ウォレット等の外部口座や一時口座)。
initと併用すれば新規の System 所有口座を作成可能。 - 自動検証:
owner == system_program::IDを検証(未初期化/初期化済みのいずれでも受け取り可)。 - 注意:
create_accountで最終的な所有者を他プログラムに設定した場合、処理後は System 所有ではなくなるため、後続の命令では適切な型(例:UncheckedAccount<'info>や該当プログラム用の型)で受け直す。 - 手数料:
initを使う場合のみpayerの指定が必要。
UncheckedAccount/AccountInfo:
低レベルアカウント操作
最も基本的なアカウント情報にアクセスする際に使用します。高度なカスタム処理に必要な低レベルAPIです。
基本的な使用パターン
#[derive(Accounts)]
pub struct LowLevelAccess<'info> {
    pub authority: Signer<'info>,

    /// CHECK: Manual validation for complex logic
    pub raw_account: UncheckedAccount<'info>,
}
直接的なデータ操作
pub fn read_raw_data(ctx: Context<LowLevelAccess>) -> Result<()> {
    let account = &ctx.accounts.raw_account.to_account_info();

    // 1. 基本情報の取得
    msg!("Account key: {}", account.key());
    msg!("Owner: {}", account.owner);
    msg!("Lamports: {}", account.lamports());
    msg!("Data length: {}", account.data_len());

    // 2. データの直接読み取り
    let data = account.try_borrow_data()?;
    let first_byte = data[0];
    msg!("First byte: {}", first_byte);

    // 3. データの直接書き込み(mutの場合)
    if account.is_writable {
        require!(account.owner == ctx.program_id, ErrorCode::InvalidOwner);
        let mut data = account.try_borrow_mut_data()?;
        data[0] = 42;
        // 注意:外部プログラム所有の場合はCPIを使用
    }

    Ok(())
}
複数アカウントの動的処理
pub fn process_multiple_accounts(
    ctx: Context<LowLevelAccess>
) -> Result<()> {
    // ctx.remaining_accountsを動的に処理
    for (index, account) in ctx.remaining_accounts.iter().enumerate() {
        // 各アカウントの検証と処理
        require!(account.owner == &ctx.program_id, ErrorCode::InvalidOwner);

        let account_data = account.try_borrow_data()?;
        msg!("Account {}: {} bytes", index, account_data.len());
    }

    Ok(())
}
使用時の注意点
- 手動検証必須: 全ての検証を手動で実装
- 型安全性なし: コンパイル時の型チェックが効かない
- セキュリティリスク: 不適切な使用で脆弱性が発生する可能性
- 高い柔軟性: 他のタイプでは実現できない複雑な処理が可能
InterfaceAccount<'info, T>:
インターフェース実装の検証
特定のインターフェースを実装したアカウントを検証する際に使用します。Token-2022などの新しい標準で活用されます。
基本的な使用パターン
use anchor_lang::prelude::{Interface, InterfaceAccount};
use anchor_spl::token_interface::{Mint, TokenAccount, TokenInterface};

#[derive(Accounts)]
pub struct TokenInterfaceExample<'info> {
    pub authority: Signer<'info>,

    // インターフェース準拠のミント
    pub mint: InterfaceAccount<'info, Mint>,

    // インターフェース準拠のトークンアカウント
    #[account(
        mut,
        associated_token::mint = mint,
        associated_token::authority = authority,
        associated_token::token_program = token_program
    )]
    pub token_account: InterfaceAccount<'info, TokenAccount>,

    #[account(mut)]
    pub destination: InterfaceAccount<'info, TokenAccount>,

    pub token_program: Interface<'info, TokenInterface>,
}
Token-2022との互換性
pub fn transfer_with_interface(
    ctx: Context<TokenInterfaceExample>,
    amount: u64
) -> Result<()> {
    // Token-2022とSPL Token両方に対応
    let cpi_context = CpiContext::new(
        ctx.accounts.token_program.to_account_info(),
        anchor_spl::token_interface::Transfer {
            from: ctx.accounts.token_account.to_account_info(),
            to: ctx.accounts.destination.to_account_info(),
            authority: ctx.accounts.authority.to_account_info(),
        },
    );

    anchor_spl::token_interface::transfer(cpi_context, amount)?;
    Ok(())
}
メリット
- 前方互換性: 新しいトークン標準に自動対応
- 柔軟性: 複数のトークンプログラムをサポート
- 型安全性: インターフェース準拠を自動検証
Token/Token-2022一貫性の重要性
InterfaceAccountを使用する際は、Program型とアカウント所有者の一貫性を保つ必要があります:
Program<'info, Token> / Program<'info, Token2022>(型:anchor_spl::token_2022::Token2022)は、操作対象の Mint/TokenAccount を所有するプログラムIDと一致させる必要があります。Interface<'info, TokenInterface> を使うと、SPL Token と Token-2022 の差異を吸収できます。プログラム所有者を検証する場合は、account.to_account_info().owner を参照してください。
Account<'info, Mint>:SPLトークンミント操作
SPLトークンのミント情報を扱う際の専用タイプです。ミント固有の検証と操作を提供します。
基本的な使用パターン
#[derive(Accounts)]
pub struct MintOperations<'info> {
    pub authority: Signer<'info>,

    // SPLトークンミント
    #[account(
        mut,
        constraint = token_mint.mint_authority == COption::Some(authority.key())
    )]
    pub token_mint: Account<'info, Mint>,

    #[account(mut)]
    pub destination: Account<'info, TokenAccount>,

    pub token_program: Program<'info, Token>,
}
ミント操作の実装
pub fn mint_tokens(
    ctx: Context<MintOperations>,
    amount: u64
) -> Result<()> {
    // ミント権限の検証
    require!(
        ctx.accounts.token_mint.mint_authority == COption::Some(ctx.accounts.authority.key()),
        ErrorCode::UnauthorizedMintAuthority
    );

    // トークンのミント実行
    let cpi_context = CpiContext::new(
        ctx.accounts.token_program.to_account_info(),
        spl_token::cpi::MintTo {
            mint: ctx.accounts.token_mint.to_account_info(),
            to: ctx.accounts.destination.to_account_info(),
            authority: ctx.accounts.authority.to_account_info(),
        },
    );

    spl_token::cpi::mint_to(cpi_context, amount)?;
    Ok(())
}
ミント情報の取得
pub fn get_mint_info(ctx: Context<MintOperations>) -> Result<()> {
    let mint = &ctx.accounts.token_mint;

    msg!("Mint authority: {:?}", mint.mint_authority);
    msg!("Supply: {}", mint.supply);
    msg!("Decimals: {}", mint.decimals);
    msg!("Is initialized: {}", mint.is_initialized);
    msg!("Freeze authority: {:?}", mint.freeze_authority);

    Ok(())
}
Account<'info, TokenAccount>:SPLトークンアカウント操作
SPLトークンアカウントの残高管理や転送操作に使用する専用タイプです。
基本的な使用パターン
#[derive(Accounts)]
pub struct TokenAccountOperations<'info> {
    pub authority: Signer<'info>,

    #[account(
        mut,
        constraint = from_token_account.owner == authority.key(),
        constraint = from_token_account.mint == to_token_account.mint
    )]
    pub from_token_account: Account<'info, TokenAccount>,

    #[account(mut)]
    pub to_token_account: Account<'info, TokenAccount>,

    pub token_program: Program<'info, Token>,
}
残高チェックと転送
pub fn transfer_with_balance_check(
    ctx: Context<TokenAccountOperations>,
    amount: u64
) -> Result<()> {
    let from_account = &ctx.accounts.from_token_account;

    // 残高チェック
    require!(
        from_account.amount >= amount,
        ErrorCode::InsufficientBalance
    );

    // アカウント状態の検証
    require!(
        from_account.state == spl_token::state::AccountState::Initialized,
        ErrorCode::UninitializedAccount
    );

    // 転送実行
    let cpi_context = CpiContext::new(
        ctx.accounts.token_program.to_account_info(),
        spl_token::cpi::Transfer {
            from: ctx.accounts.from_token_account.to_account_info(),
            to: ctx.accounts.to_token_account.to_account_info(),
            authority: ctx.accounts.authority.to_account_info(),
        },
    );

    spl_token::cpi::transfer(cpi_context, amount)?;
    Ok(())
}
Associated Token Account(ATA)の作成
#[derive(Accounts)]
pub struct CreateATA<'info> {
    #[account(mut)]
    pub payer: Signer<'info>,

    /// CHECK: ATA will be created for this wallet
    pub wallet: UncheckedAccount<'info>,

    pub mint: Account<'info, Mint>,

    #[account(
        init,
        payer = payer,
        associated_token::mint = mint,
        associated_token::authority = wallet
    )]
    pub associated_token_account: Account<'info, TokenAccount>,

    pub token_program: Program<'info, Token>,
    pub associated_token_program: Program<'info, AssociatedToken>,
    pub system_program: Program<'info, System>,
}
Program<'info, System>:
システムプログラム操作
Solanaのシステムプログラムを呼び出してアカウント作成や転送を行う際に使用します。
基本的な使用パターン
#[derive(Accounts)]
pub struct SystemOperations<'info> {
    #[account(mut)]
    pub from: Signer<'info>,

    /// CHECK: SOL transfer destination
    #[account(mut)]
    pub to: UncheckedAccount<'info>,

    pub system_program: Program<'info, System>,
}
SOL転送の実装
pub fn transfer_sol(
    ctx: Context<SystemOperations>,
    amount: u64
) -> Result<()> {
    // システムプログラムを使用したSOL転送
    let cpi_context = CpiContext::new(
        ctx.accounts.system_program.to_account_info(),
        system_program::Transfer {
            from: ctx.accounts.from.to_account_info(),
            to: ctx.accounts.to.to_account_info(),
        },
    );

    system_program::transfer(cpi_context, amount)?;
    Ok(())
}
アカウント作成の実装
#[derive(Accounts)]
pub struct CreateAccount<'info> {
    #[account(mut)]
    pub payer: Signer<'info>,

    #[account(
        mut,
        signer,
        constraint = new_account.lamports() == 0,
        constraint = new_account.data_len() == 0,
        constraint = new_account.owner == &system_program::ID
    )]
    pub new_account: SystemAccount<'info>,

    pub system_program: Program<'info, System>,
}

pub fn create_account(
    ctx: Context<CreateAccount>,
    space: u64,
    owner: Pubkey
) -> Result<()> {
    let rent = Rent::get()?.minimum_balance(space as usize);

    let cpi_context = CpiContext::new(
        ctx.accounts.system_program.to_account_info(),
        system_program::CreateAccount {
            from: ctx.accounts.payer.to_account_info(),
            to: ctx.accounts.new_account.to_account_info(),
        },
    );

    system_program::create_account(
        cpi_context,
        rent,
        space,
        &owner
    )?;

    Ok(())
}
※ 上記は「新規鍵ペアでの作成」例です。PDA を作成する場合は signer を付けず、seeds/bump を用いた invoke_signed(Anchor の #[account(..., seeds, bump)])で署名します。
よく使用するシステム操作
// アカウントサイズの変更
system_program::allocate(cpi_context, space)?;

// アカウント所有者の変更
system_program::assign(cpi_context, &new_owner)?;

// アカウントサイズと所有者の同時変更
system_program::allocate_and_assign(cpi_context, space, &owner)?;
エラー対策とデバッグ
各アカウントタイプでよく発生するエラーと対処法をまとめます。
よくあるエラーパターン
| エラー | 原因 | 解決策 |
|---|---|---|
AccountNotSigner | Signerが必要なのに他タイプを使用 | Signer<'info>に変更 |
AccountOwnedByWrongProgram | 所有者チェック失敗 | 正しいプログラムIDを確認 |
AccountDidNotDeserialize | 構造体の不一致 | データ構造を確認 |
ComputeBudgetExceeded | CPU制限超過 | ゼロコピー化(AccountLoader)/ ループ削減 / CPI回数削減 / ComputeBudgetInstructionでCU増 |
ConstraintHasOne | 関連付けチェック失敗 | アカウント間の関係を確認 |
デバッグに役立つ実装パターン
#[derive(Accounts)]
pub struct DebugFriendly<'info> {
    pub authority: Signer<'info>,

    #[account(
        mut,
        has_one = authority @ ErrorCode::UnauthorizedAccess,
        constraint = user_data.is_active @ ErrorCode::InactiveUser,
        constraint = user_data.level >= 1 @ ErrorCode::InsufficientLevel
    )]
    pub user_data: Account<'info, UserData>,
}

#[error_code]
pub enum ErrorCode {
    #[msg("Unauthorized: account authority mismatch")]
    UnauthorizedAccess,
    #[msg("User account is not active")]
    InactiveUser,
    #[msg("User level insufficient for operation")]
    InsufficientLevel,
}
💡 実装のヒント
アカウントタイプの選択に迷った場合は、まず型安全な選択肢(Account、Signer等)を検討し、パフォーマンスや柔軟性の要件に応じてUncheckedAccountやAccountLoaderを選択しましょう。セキュリティは常に最優先に考慮してください。
この記事が参考になったら
この記事が役に立ったと思いましたら、よろしければフォローをお願いします。
Solanaのアカウント設計やプログラム開発でお困りでしたら、お気軽にご連絡ください。
株式会社hanzochangお問い合わせフォーム
また、趣味で2017年ごろより匿名アカウントでCryptoの調査等を行い、 ブロックチェーンメディアやSNSでビットコイン論文等の図解等を発信していました。
最新の記事
x402 × Solana実装ガイド | 支払い対応MCPサーバーをTypeScriptで構築する
x402 V2プロトコルのSolana実装を徹底解説。SVM exact schemeの仕組みから、@x402/mcpパッケージを使った支払い対応MCPサーバーの構築まで、実際のコードとともにステップバイステップで解説します。
x402 V2 解説 | Solana等マルチチェーン対応・OpenClawの自動売買にも利用されるHTTP決済プロトコル
累計$600M超のボリュームを記録するHTTP決済プロトコルx402がV2で大幅進化。Solana等のマルチチェーン対応、Extensions拡張機構、Discovery APIを解説。OpenClaw FoundryやClawRouterなどAIエージェントの自動売買での採用事例も紹介します。
x402とは? AIエージェント × MCP × 暗号資産が交差するHTTP自動決済プロトコル
HTTP 402を活用した決済プロトコル「x402」の入門ガイド。暗号資産(USDC)即時決済、AIエージェントによるMCP経由の自動購入、マルチチェーン対応まで、全体像を解説します。
ClaudeCode スマホでリモート接続 - OpenClawはもう不要?! RemoteControlを使おう
Claude Code Remote Controlを使えば、PCで動作中のセッションをスマホやタブレットからそのまま操作できます。QRコード接続、セキュリティ設定、トラブルシューティングまで解説します。

OpenClaw × Solana 事例まとめ - 公式スキル・周辺プロダクト・使いどころ
OpenClawとSolanaが交わる実例(公式スキル、周辺プラグイン、取引・監視系プロジェクト、ハッカソン)を一次ソースのリンク付きで一覧にまとめます。
OpenClaw APIトークン節約 - Happy + Claude Codeで出先から開発・指示出し
Happyのプロセス切断をOpenClawで復帰させ、出先からいつでもClaude Code / Codexにリモートアクセスする方法を解説。APIトークンの節約と、スマホ1台で完結するAI開発ワークフローを紹介します。